


In most cases, it is necessary or a best practice to set id as a primary key of a database table. MS SQL Server is one of the most popular Database servers. In this very quick tutorial, we will learn two methods to set a table column as a primary key and autoincrement in SQL.
Tools Required:
- MS SQL Server 2008 or later version.
- MS SQL Server Management Studio. Download them from THIS LINK.
Method One: (primary key and Autoincrement in SQL)
- Open the MS SQL Management Studio and go to your database.
- Right click on Tables and click on Table option.
- Add the column name as id and data type to int.
- Now right click on arrow in the left side of id and click on primary key option as mentioned in image below.


This will set your id column as a primary key of the table.
Now to make it auto-increment, select your id field and go to the column properties tab below and find a property called identity specification, under which you’ll find a property called is Identity. Set this property to Yes.

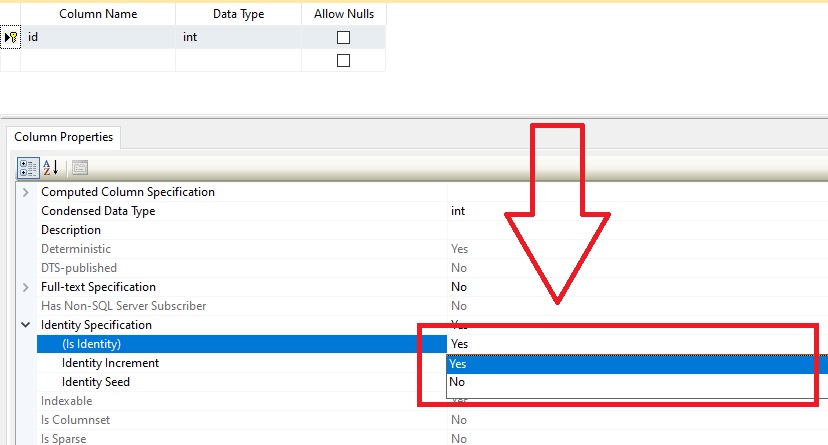
This will make the id column auto-increment.
Method Two:
You can also set a column as a primary key and auto-increment by using query while creating your table like,
CREATE TABLE Student(
    id int IDENTITY(1,1) PRIMARY KEY,
    Name varchar(255),
    Age int
);
The above query will create a table called Student and set the id column as primary key and auto-increment. Now, you don’t have to pass any value to the id field, the SQL Server will automatically add a value into it by an increment of one.
I hope you enjoyed this tutorial. Thanks for Visiting C# Ui Academy.