


Barcodes are an essential aspect of modern business operations, from retail sales to supply chain management. They are used to automate and streamline many processes, making them faster and more efficient. However, sometimes displaying barcodes in the right format and in the right place can be a challenge.
In this tutorial, we will learn how to display barcodes on every page of your PDF file using Laravel.By the end of this tutorial, you will have a fully functional Laravel application that can generate PDF files with barcodes on every page. So, let’s dive in and learn how to display barcodes on every page of your PDF file using Laravel!
Prerequisites
Before we dive into the implementation, there are a few prerequisites that you will need to have in place:
- Basic understanding of Laravel framework
- A Laravel project set up on your local machine
- The “barryvdh/laravel-dompdf” package installed and set up in your Laravel project
- The “picqer/php-barcode-generator” package installed and set up in your Laravel project
- The Imagick PHP extension installed and enabled on your server
If you don’t have any of the above prerequisites set up, don’t worry! We will go through each step in detail to make sure you can follow along and get everything set up correctly.
Installing and Setting up the barryvdh/laravel-dompdf Package in Laravel
Open your terminal or command prompt and navigate to the root directory of your Laravel project.
Run the following command to install the barryvdh/laravel-dompdf package:
composer require barryvdh/laravel-dompdf
After the package is installed, open the config/app.php file and add the following line to the providers array:
Barryvdh\DomPDF\ServiceProvider::class,
Next, add the following line to the aliases array:
'PDF' => Barryvdh\DomPDF\Facade::class,
This will allow you to use the PDF facade to generate PDF files in your Laravel application.
Save the config/app.php file and exit your text editor.
That’s it! You have now successfully installed and set up the barryvdh/laravel-dompdf package in your Laravel project.
Installing and Setting up the picqer/php-barcode-generator Package in Laravel
Open your terminal or command prompt and navigate to the root directory of your Laravel project.
Run the following command to install the picqer/php-barcode-generator package:
composer require picqer/php-barcode-generator
After the package is installed, you can start using it in your Laravel application by including the following line at the top of your PHP file:
use Picqer\Barcode\BarcodeGenerator;
Installing and Enabling the Imagick PHP Extension on Your Server
- Go to the official ImageMagick website (https://imagemagick.org/script/download.php#windows) and download the appropriate ImageMagick version for your system (e.g., ImageMagick-7.0.10-34-Q16-HDRI-x64-static.exe).
- Run the downloaded ImageMagick installer and select “Install legacy utilities (e.g. convert)” and “Add application directory to your system path” during the installation process.
- Download the appropriate version of the Imagick PHP extension from the PECL website (https://pecl.php.net/package/imagick) that corresponds with your PHP version and architecture (e.g., php_imagick-3.5.1-7.4-ts-vc15-x64.zip for PHP 7.4 on Windows x64).
- Extract the downloaded extension archive and copy the
php_imagick.dllfile to your PHP extensions directory (e.g.,C:\php\ext). - In your PHP configuration file (e.g.,
php.ini), add the following line to enable the extension:
extension=php_imagick.dll
Restart your web server to apply the changes.
That’s it! The Imagick PHP extension should now be installed and enabled on your Windows system.
Creating a New Laravel Project named “PDFBarCodeAdder”
Open your command prompt or terminal and navigate to the directory where you want to create your new Laravel project.
Run the following command to create a new Laravel project:
composer create-project --prefer-dist laravel/laravel PDFBarCodeAdder
This will create a new Laravel project named “PDFBarCodeAdder” in a new directory with the same name.
Once the project is created, navigate into the project directory using the command:
cd PDFBarCodeAdder
That’s it! You now have a new Laravel project named “PDFBarCodeAdder” set up and ready to go.
Setting Up the View for PDF Generation
We will now set up the default welcome view for our Laravel project. To do this, follow these steps:
Replace the contents of the welcome.blade.php file located in resources/views directory with the following code:
<!doctype html>
<html lang="en">
<head>
    <meta charset="UTF-8">
    <meta name="viewport"
          content="width=device-width, user-scalable=no, initial-scale=1.0, maximum-scale=1.0, minimum-scale=1.0">
    <meta http-equiv="X-UA-Compatible" content="ie=edge">
    <link rel="stylesheet" href="https://cdn.jsdelivr.net/npm/bootstrap@4.4.1/dist/css/bootstrap.min.css"
          integrity="sha384-Vkoo8x4CGsO3+Hhxv8T/Q5PaXtkKtu6ug5TOeNV6gBiFeWPGFN9MuhOf23Q9Ifjh" crossorigin="anonymous">
    <title>PDF UPloader</title>
</head>
<body>
<div class="card mx-auto" style="max-width: 500px; margin-top: 200px;">
    <div class="card-body border">
        <h5 class="card-title">Upload PDF</h5>
        <form method="post" action="{{route('add_bar_code_to_pdf')}}" enctype="multipart/form-data">
            @csrf
            <div class="form-group">
                <input type="file" name="pdf_file_from_request" accept="application/pdf" class="form-control">
            </div>
            <div class="btn-group text-center" role="group" aria-label="Basic example">
                <button type="submit" class="btn btn-primary">Upload</button>
                <a href="#" class="btn btn-success">Download PDF With BarCode</a>
            </div>
        </form>
    </div>
</div>


<script src="https://code.jquery.com/jquery-3.4.1.slim.min.js"
        integrity="sha384-J6qa4849blE2+poT4WnyKhv5vZF5SrPo0iEjwBvKU7imGFAV0wwj1yYfoRSJoZ+n"
        crossorigin="anonymous"></script>
<script src="https://cdn.jsdelivr.net/npm/popper.js@1.16.0/dist/umd/popper.min.js"
        integrity="sha384-Q6E9RHvbIyZFJoft+2mJbHaEWldlvI9IOYy5n3zV9zzTtmI3UksdQRVvoxMfooAo"
        crossorigin="anonymous"></script>
<script src="https://cdn.jsdelivr.net/npm/bootstrap@4.4.1/dist/js/bootstrap.min.js"
        integrity="sha384-wfSDF2E50Y2D1uUdj0O3uMBJnjuUD4Ih7YwaYd1iqfktj0Uod8GCExl3Og8ifwB6"
        crossorigin="anonymous"></script>
</body>
</html>
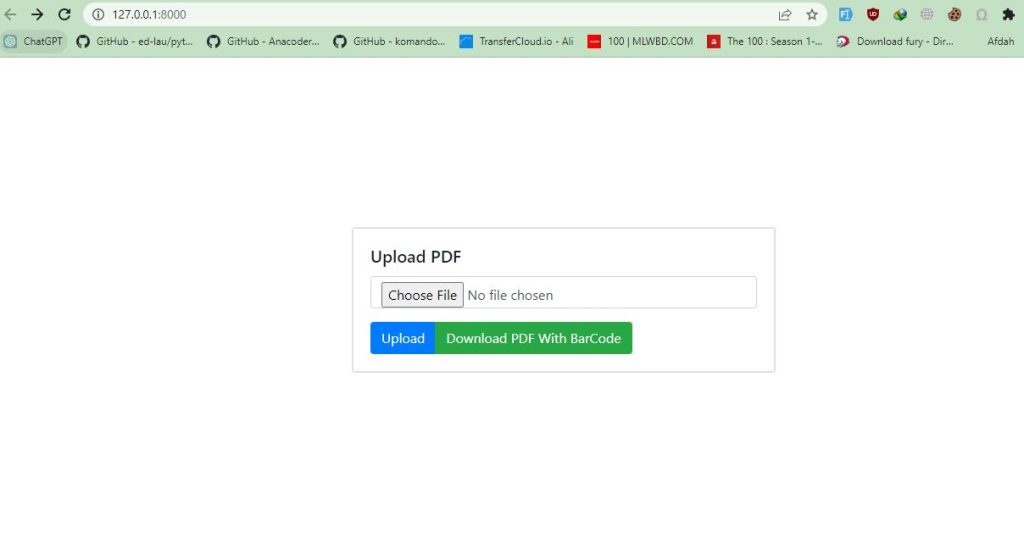
Output

Generating a Controller to Handle File Attachments in Laravel
Open your terminal or command prompt and navigate to the root directory of your Laravel project.
Run the following command to generate a new controller named AttachmentController:
php artisan make:controller AttachmentController
This will create a new file named AttachmentController.php in the app/Http/Controllers directory of your Laravel project.
Open the AttachmentController.php file and add the following code:
<?php

namespace App\Http\Controllers;

use Imagick;
use App\Models\Attachment;
use Illuminate\Http\Request;
use Illuminate\Support\Facades\File;
use Illuminate\Support\Facades\Storage;
use BaconQrCode\Renderer\Image\Png;
use BaconQrCode\Writer;
use Picqer\Barcode\BarcodeGeneratorPNG;

class AttachmentController extends Controller
{
    public function PDFBarCodeAdder( Request $request )
    {
        $model = new Attachment();
        if ( $request->hasFile('pdf_file_from_request') ) {
            $pdf      = $request->file('pdf_file_from_request');
            $fileName = time() . '.' . $pdf->getClientOriginalName();
            // Saving pdf in temporay Directory Public
            $temporary_path_pdf = 'Temporary_files/Temporary_pdf/';
            $pdf->move($temporary_path_pdf, $fileName);

            //Converting pdf to Images

            set_time_limit(300);
            // Get the PDF file from the storage folder
            $pdfPath = public_path('Temporary_files/Temporary_pdf/' . $fileName);

            // Create an Imagick object
            $imagick = new Imagick();

            // Set the resolution and output format
            $imagick->setResolution(300, 300);
            $imagick->setFormat('jpeg');

            // Read the PDF file into the Imagick object
            $imagick->readImage($pdfPath);

            // Convert each page of the PDF to an image
            foreach ( $imagick as $page ) {
                $page->writeImage(public_path("Temporary_files/Temporary_images/page{$page->getImageIndex()}.jpg"));
            }

            flash()->addSuccess('Conversion Successfully');
            $path = public_path('Temporary_files/Temporary_pdf/');
            File::cleanDirectory($path);

            //Adding QR Code TO Images here

            $files = File::files('Temporary_files/Temporary_images');

            foreach ( $files as $file ) {
                // Generate a barcode image for the file
                $barcodeGenerator = new BarcodeGeneratorPNG();
                $data             = '';
                for ( $i = 0; $i < 10; $i++ ) {
                    $data .= rand(0, 9);
                }
                $barcodeString = $barcodeGenerator->getBarcode($data, $barcodeGenerator::TYPE_CODE_128);

                // Create an image resource from the barcode string
                $barcodeImage = imagecreatefromstring($barcodeString);
                // Load the original image
                $originalImage = imagecreatefromjpeg($file->getPathname());
                imagefill($barcodeImage, 0, 0, imagecolorallocate($barcodeImage, 255, 255, 255));
                imagecopyresized($originalImage, $barcodeImage, imagesx($originalImage) - imagesx($barcodeImage) - 450, 10, 0, 0, 3 * imagesx($barcodeImage), 3 * imagesy($barcodeImage), imagesx($barcodeImage), imagesy($barcodeImage));
                imagejpeg($originalImage, 'Temporary_files/Temporary_images_with_Bar_code/' . $file->getFilename());
            }
            $path = public_path('Temporary_files/Temporary_images/');
            File::cleanDirectory($path);
            flash()->addSuccess('Bar Code Added Successfully');


            //CONVERT IMAGES TO PDF

            // Create a new Imagick object
            $imagick = new Imagick();

            // Set the resolution of the PDF
            $imagick->setResolution(300, 300);

            // Iterate over the images in the "modified_images" directory
            foreach ( glob("Temporary_files/Temporary_images_with_Bar_code/*.jpg") as $temp_image ) {
                // Read the image file
                $imagick->readImage($temp_image);
            }

            // Set the format of the PDF to "application/pdf"
            $imagick->setImageFormat('pdf');

            // Save the PDF to a file , PDF is Saved in public project-attachments
            $imagick->writeImages('project-attachments/' . $fileName, true);
            $path = public_path('Temporary_files/Temporary_images_with_Bar_code/');
            File::cleanDirectory($path);
            $model->pdf_file_name_in_datebase = $fileName;
            $model->save();
            return back();


        }
    }


}
Creating Routes in Laravel’s web.php File
Route::get('/', function () {
    return view('welcome');
});

Route::post('/store/pdf',[AttachmentController::class,'PDFBarCodeAdder'])->name('add_bar_code_to_pdf');
Testing
When you test the application, you can choose a PDF file and click on the ‘Upload’ button to initiate the PDF to image conversion process with QR code addition. The temporary PDF files are saved in the ‘Temporary_files/Temporary_pdf’ directory within the public folder, and the temporary images are saved in the ‘Temporary_files/Temporary_images’ directory. The final PDF with Bar codes added is saved in the ‘project-attachments’ directory.
Conclusion:
This tutorial teaches how to display barcodes on every page of a PDF file using Laravel, including prerequisites like setting up Laravel, installing packages, and enabling the Imagick PHP extension. The tutorial also covers creating a new Laravel project and setting up the view for PDF generation.